Step-by-Step Guide to Setting Up Azure Load Balancer for High Availability
Did you know that by September 30, 2025, the Basic SKU for the Azure Load Balancer will be retired? This change shows how important it is to know and use cloud solutions for high availability. The Azure Load Balancer helps spread traffic, keeping your apps running smoothly and reducing downtime.
This guide will help you understand and use Azure Load Balancer well. By following the steps, you can make sure your important services stay up and running. They will be ready to handle failures.
Understanding Azure Load Balancer and Its Importance
Azure Load Balancer is key to keeping your apps up and running. It spreads out network traffic among many resources. This boosts performance and makes your system more reliable.
What is Azure Load Balancer?
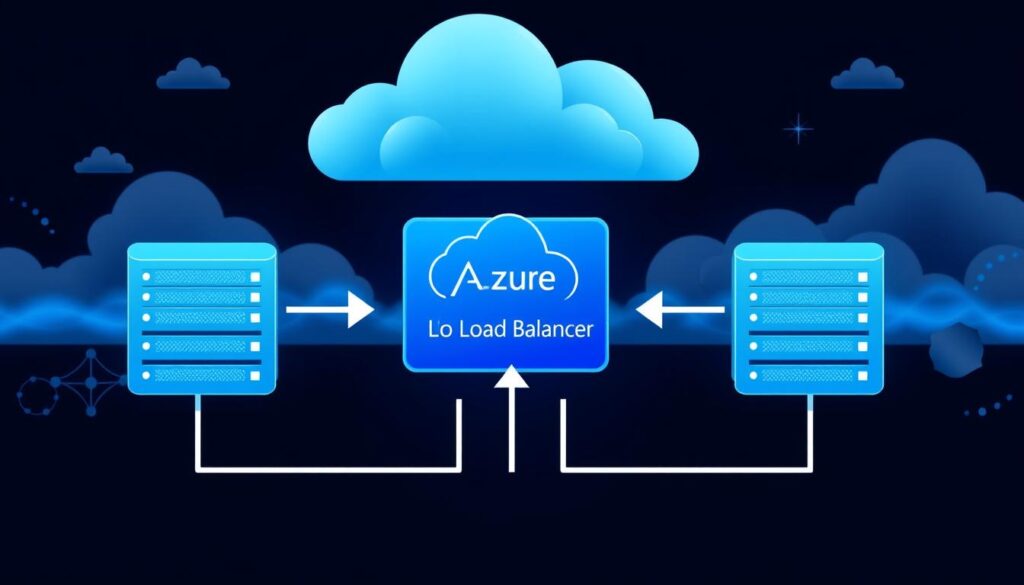
The Azure Load Balancer is a service by Microsoft. It works at Layer 4 of the OSI model. This means it can handle millions of flows for TCP and UDP apps.
It’s fast and balances both internal and external traffic to Azure virtual machines. Azure Load Balancer also checks on resources with health probes. This is important for keeping your cloud solutions running smoothly.
It supports IPv6 and can handle many ports and IP addresses at once. The Standard Load Balancer also fits into the Zero Trust network security model. This means it keeps connections closed by default unless you say it’s okay.
High Availability and Its Significance in Cloud Solutions
High availability means a system works without stopping for a long time. This is very important in the cloud because downtime can hurt your business a lot. Azure Load Balancer helps by letting virtual machines switch to another server if needed.
In areas with availability zones, Azure Load Balancer gets even better. It keeps a frontend IP address working even if one zone fails. This makes sure your services keep running smoothly, even during problems.
| Feature | Description |
|---|---|
| Layer 4 Operation | Functions at TCP/UDP level, providing load balancing for various applications. |
| High Availability | Ensures continuous operations with seamless failover capabilities. |
| Health Probes | Monitors load-balanced resources, enriching reliability. |
| IPv6 Support | Load balancing for modern IP configurations. |
| Zone Redundancy | Maintains service availability even if one zone fails. |
Prerequisites for Setting Up Azure Load Balancer
Before you start setting up Azure Load Balancer, it’s important to know what you need. This knowledge helps you set up resources well and fast.
What You Need Before Getting Started
First, learn about key networking ideas and Azure parts. Knowing about public and private IP addresses, network security groups, and subnets is key. Also, understanding Azure’s management tools will make using the Azure Portal easier.
Creating an Azure Account and Subscription
To use Azure services, you need to create an Azure account. You can choose a free or pay-as-you-go subscription. This lets you access many Azure resources, like the Load Balancer. Make sure your Azure account is set up right, as you’ll need an active subscription for the Load Balancer.

Setting Up Azure Load Balancer for High Availability
Setting Up Azure Load Balancer for High Availability is easy in the Azure Portal. First, create a new load balancer. Make sure it’s set up right for your apps to run smoothly.
Creating Load Balancer in Azure Portal
To start, go to the Azure Portal and click “Create a resource.” Look for ‘Load Balancer’ and start the setup. You can name it, pick a SKU, and choose a region. This makes sure your load balancer works well for all apps.
Configuring Frontend IP Address
Then, set up the frontend IP address. Choose a static IP that fits your Virtual Network. This helps manage traffic well for both inside and outside access. It keeps your apps running smoothly and ready to scale.
Defining Backend Pool and Health Probes
Next, define the backend pool by adding your server VMs. Group them right, like in the same set or zone. This helps spread the load evenly. Also, health probes are key to check if VMs are working. They make sure only working instances get traffic, making your apps more reliable.
| Configuration Step | Details |
|---|---|
| Create Load Balancer | Access Azure Portal, create resource, select Load Balancer, define name and SKU. |
| Frontend IP Configuration | Select static IP assignment, ensure linkage to the Virtual Network. |
| Backend Pool Association | Group server VMs in availability set or zone. |
| Health Probes Configuration | Implement probes to monitor VM status and ensure traffic routing to healthy instances. |
Azure Load Balancer Configuration Best Practices
Setting up Azure Load Balancer needs careful thought to get the best results. By following the best practices, you can make your network services more reliable.
Choosing the Right SKU for Your Load Balancer
Picking the right SKU for your Azure Load Balancer is key. The Standard Load Balancer is best for production use because of its features and growth options. Different SKUs offer different features, like bigger backend pools, which are great for busy apps.
Implementing Load Balancer Redundancy in Azure
Having redundant load balancers in Azure is essential for keeping services up. You can set up multiple load balancers and health probes to check VM instances. This way, traffic is spread out well across all resources.
Rules for different protocols can be set up. This makes sure traffic is handled smoothly. High availability ports can also be used to simplify systems with many ports.
Monitoring and Troubleshooting Your Load Balancer
Monitoring and fixing issues are critical for your load balancer’s performance. Use Azure Monitor and Network Watcher to see how your VMs are doing. This helps catch problems early.
Customizing session persistence can improve user experience during busy times. Regularly test failover scenarios to make sure everything works right. This gives you confidence in disaster recovery.

Implementing Load Balancer in Azure for SQL Server Availability Groups
Using the Azure Load Balancer for SQL Server Availability Groups boosts your cloud’s reliability. Start by creating SQL virtual machines (VMs) in the same set or zone. This makes your system fault-tolerant and integrates well with Azure.
Creating Availability Groups in Azure VMs
First, set up your SQL Server instances in Azure VMs. Make sure each instance uses static IP addresses and has the right subnet mask. This setup is key for the load balancer to work right.
Also, make sure the instances are part of a failover cluster. They need a local admin account and sysadmin role access.
Configuring Load Balancer Rules and Probes for SQL Server
To set up Azure Load Balancer failover, create rules for traffic. Use port 59999 for health probes and keep the SQL Server port at 1433. Set probe intervals to 5 seconds and idle timeouts to 4 minutes.
Link your load balancer with health probes. This ensures your SQL Server instances work well. Use a Distributed Network Name (DNN) listener from SQL Server 2019 CU8 for better connectivity.
| Configuration Aspect | Details |
|---|---|
| Frontend IP Assignment | Static |
| Subnet Mask | 255.255.255.255 |
| Health Probe TCP Port | 59999 |
| Default SQL Server TCP Port | 1433 |
| Health Probe Interval | 5 seconds |
| Idle Timeout of Load-Balancing Rules | 4 minutes |
| Quorum Type | NodeAndFileShareMajority |
Conclusion
Setting up an Azure Load Balancer is key for high availability in cloud solutions. Downtime can cause big losses and harm your reputation. An Azure Load Balancer helps avoid these risks.
It’s important to know its parts and follow best practices. This way, your apps stay up and running for users.
As user needs change, you might need to grow your setup. An Azure Load Balancer makes adding servers easy. It spreads traffic well, making servers faster and improving user experience.
Keeping an eye on your Azure Load Balancer is also critical. Use tools and probes to keep it running smoothly. Adjusting to traffic and server changes keeps your services reliable and efficient.
This approach boosts customer happiness and loyalty. It’s all about keeping your services running well.
Source Links
- Configure a load balancer & availability group listener (Azure portal) – SQL Server on Azure VMs
- Quickstart: Create a public load balancer – Azure portal – Azure Load Balancer
- How to Configure a High Availability Cluster in Azure with the Standard Load Balancer
- What is Azure Load Balancer? – Azure Load Balancer
- Reliability in Azure Load Balancer
- Configure Software Load Balancer for high availability ports – Azure Local
- Tutorial: Create a load balancer with more than one availability set in the backend pool – Azure portal – Azure Load Balancer
- Configure a high-availability setup with Azure external and internal load balancers simultaneously
- High availability ports overview in Azure – Azure Load Balancer
- Azure: Using a Load Balancer to achieve high-availability and load-balancing
- Manage rules for Azure Load Balancer – Azure portal
- Guide to Configuring High Availability in Microsoft Azure Virtual Machines
- Configure an Azure load balancer for an AG VNN listener – SQL Server on Azure VMs
- Tutorial: Configure a SQL Server Always On availability group – SQL Server on Azure VMs
- Configure an Azure load balancer for an FCI VNN – SQL Server on Azure VMs
- Load Balancer: Ensuring High Availability and Scalability
- Azure Load Balancer Overview | Everything You Need To Know